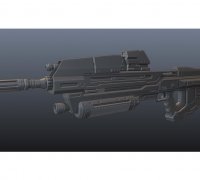
Free STL file MA40 Airsoft Halo Assault Rifle 🔫・3D printer design to download・Cults
Por un escritor de hombre misterioso

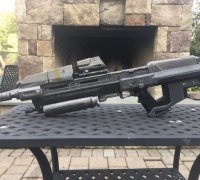
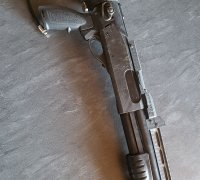
This is not an all inclusive "How-to" but rather an explanation of how I made and assembled the rifle. This airsoft gun is rather advanced and is not simple to make. It will require a lot of modification, mechanical ingenuity, plenty of airsoft teching experience and general DIY
This is not an all inclusive How-to but rather an explanation of how I made and assembled the rifle. This airsoft gun is rather advanced and is not simple to make. It will require a lot of modification, mechanical ingenuity, plenty of airsoft teching experience and general DIY'ing patience.
The MA40 Nerf gun will need to be completely gutted, all the internal workings and ribbing that holds the internals of the nerf gun will need to be cut/sanded away to make a hollow shell. There is no hardware or glue holding the Nerf Shell to the airsoft gun inside, the pressure from the narrow plastic body squeezing in on the gun keeps it in place.
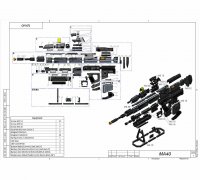
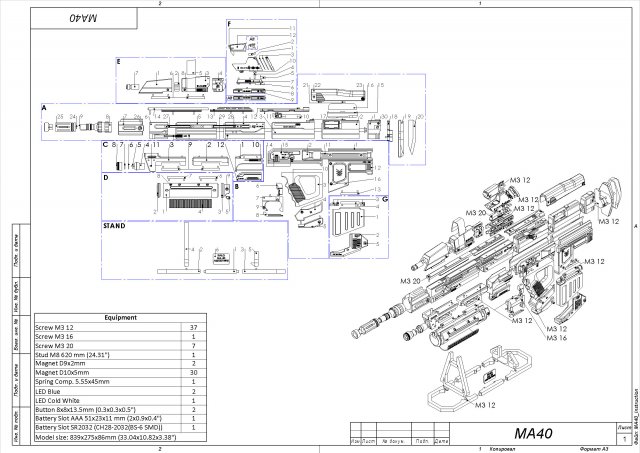
Assemble the airsoft gun by building the receiver, the hop will need to be placed in before the F2 otherwise the nozzle will be in the way of the hop up. Press a M3 nylon lock nut into the bottom of the TDC mount before securing it to the receiver with the HopUp Clamp. An M3 screw can be screwed into the TDC Mount into the captured lock nut which will act on the hopup arm allowing you to change the hop. The mag release has a pocket for holding a small spring, a cut down one from a ball point pen works well. The back plate of the receiver is a separate piece on purpose and allows you to space it out with washers to be as snug or as loose as you like on your M4 magazine of choice. Mount the 3/4' aluminum square tube to the front of the receiver under the hop up. Place what you have of the airsoft gun into the shell and mark out where you would like the trigger and HPA tank with regulator to sit. I've placed the tank on my gun right where the foregrip is and then mounted the trigger behind it at a distance that makes it comfortable to reach when holding the pistol grip. A screw can be inserted from the rear of the trigger mount to take up the slack in the trigger throw, see the picture for clarification. With these in place you can cut the aluminum tube to length, exact length is not necessary so long as the nerf shell closes over it. The sight mount and barrel clamp can now be mounted on the top of the aluminum tube. The barrel clamp is designed to squeeze the barrel extension as you tighten the top screws. Make sure the inner barrel doesn't go to the end of the barrel extension and that the 14mm threads are not obstructed as that's what will mount the suppressor/tracer. You will need to cut two slots on opposing sides of the barrel extension and glue in the Tachyon Infrared sensor so it can see a bb as it passes from the inner barrel into the suppressor. This will need to be done carefully as if it is misaligned a bb could strike the sensor or not register the bb passing by.
Air from the regulator is sent through an elbow fitting into a 6mm quick disconnect fitting. 6mm macro line runs down the length of the back of the F2. Take care pulling the factory line of the back of the F2 as you do not want to damage the brass barb or it will leak. Make sure the line has ample space in the back of the gun to make the 180 degree turn into the back of the F2 or the macro line will kink.
The battery, FCU and trigger board are zipped tied to the under side of the aluminum tube wherever there is space. I placed the battery above the HPA tank and the FCU with trigger board under the hop up. You will need to extend all wires either from the trigger board (using it as a break out point) or simply splice into the main cable. Cable color code is as follows:
Black - Top Solenoid
White - Bottom Solenoid
Red - Fire Selector
Blue - Trigger
Brown - Ground (common)
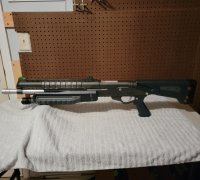
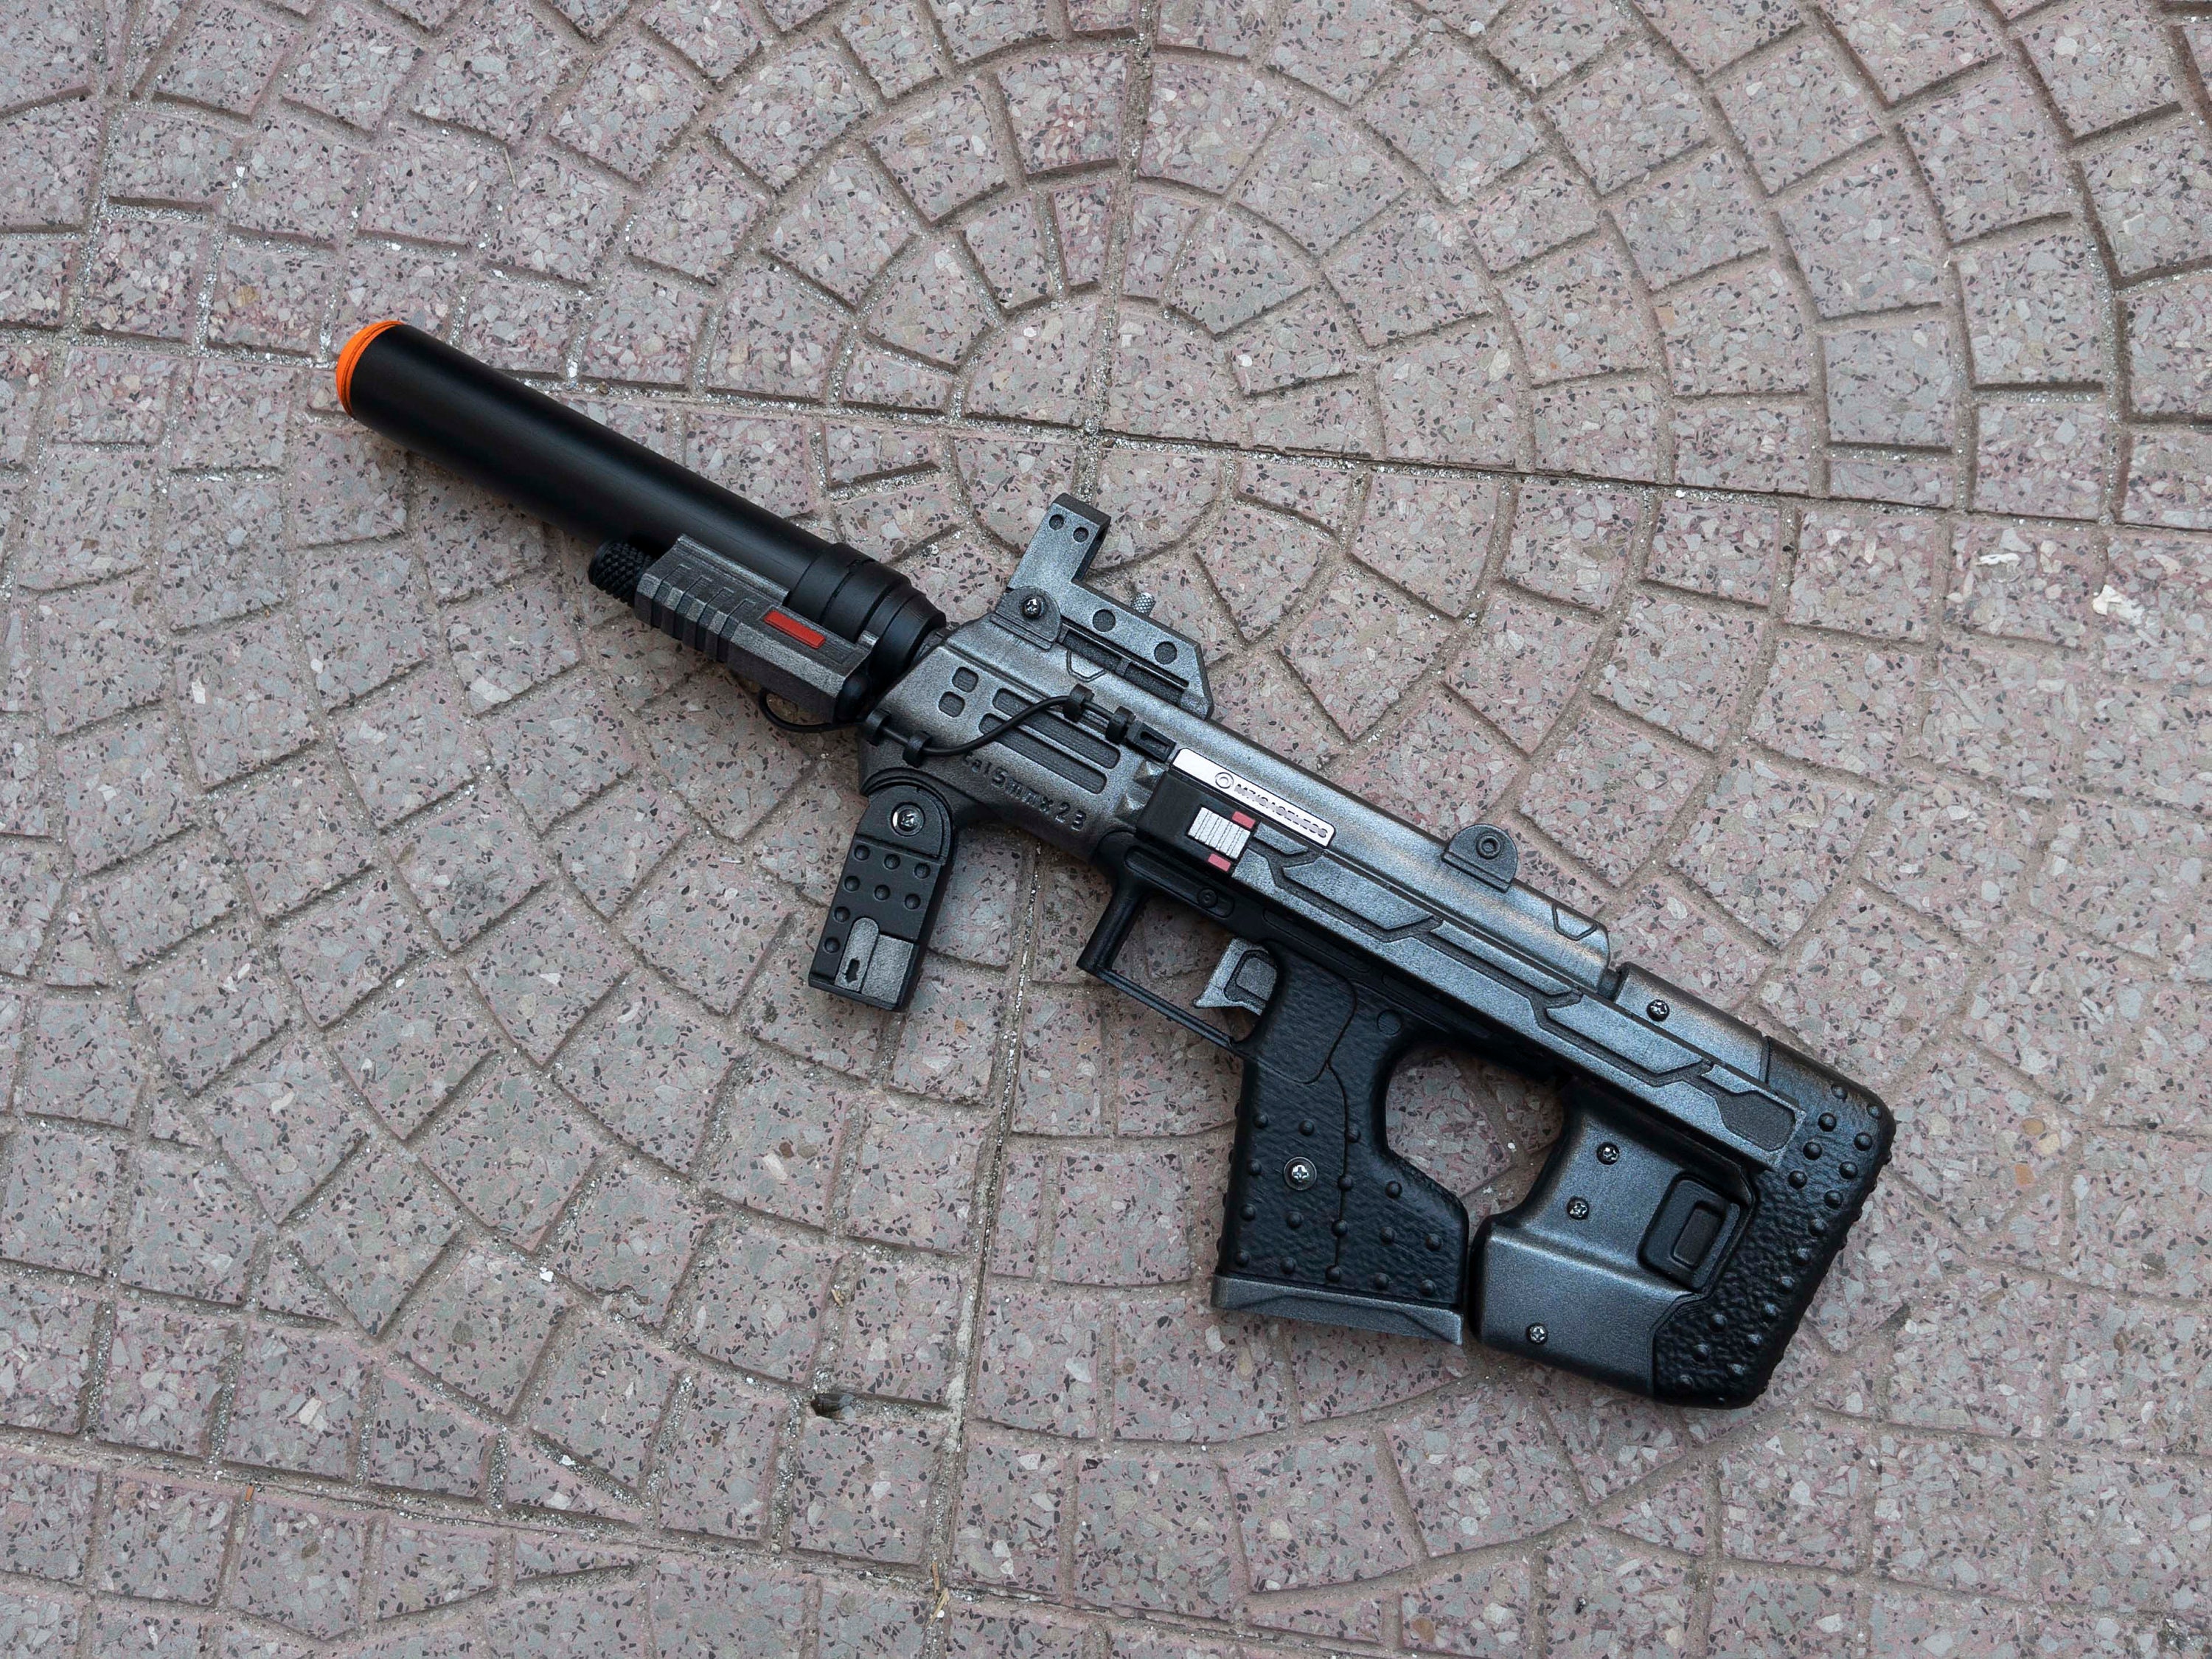
Placement of the fire selector and safety switch are up to you, I drilled holes in the Nerf shell and mounted them at the base of the grip but they can be placed anywhere you like. Make sure you also make extensions for the battery power and balance connector and run them all the way to the rear of the gun so they can be accessed from the hatch at the cheek rest. This hatch also conveniently lets you adjust the screw at the top of the hop to make hop adjustments.
Lastly paint it as desired!
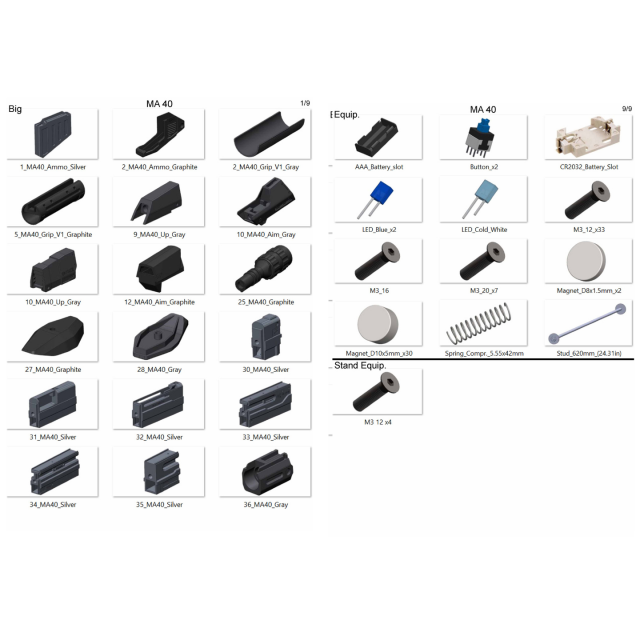
Parts Required:
Nerf MA40
PolarStar F2
13cu HPA tank
PolarStar Micro Reg
Tachyon Ammo Counter
Modify AK47 HopUp
EPM1 magazine or similiar M4 magazine
Hot Shot 60Degree bucking
Maple Leaf 455 Crazy Jet Barrel
1000mAh 7.2V lipo
SPEED Trigger (V.2)
AceTech tracer
14mm CCW Barrel extension
3/4 Aluminum square tube approx 400mm
6mm macro line approx 400mm
Others:
Misc wires, connectors and air fittings
Assorted M3 hardware

Halo Infinite MA40 Assault Rifle - 3D Print Files – Galactic Armory
halo assault rifle 3D Models to Print - yeggi
ma40 3D Models to Print - yeggi
halo 1 3D Models to Print - yeggi - page 13

3D file MA40 Assault Rifle - Halo - Printable 3d model - STL + CAD bundle - Personal Use 😇・3D printable design to download・Cults
3D file MA40 Assault Rifle - Halo - Printable 3d model - STL + CAD bundle - Personal Use 😇・3D printable design to download・Cults
Free STL file MA40 Airsoft Halo Assault Rifle 🔫・3D printer design to download・Cults

3D file MA40 Assault Rifle - Halo - Printable 3d model - STL files 😇・3D printer model to download・Cults
halo infinite ma40 assault rifle by 3D Models to Print - yeggi
MA40 Assault Rifle - Halo - Printable - STL files 3D Print Model in Toys 3DExport
halo airsoft 3D Models to Print - yeggi
Toy Smg
MA40 Assault Rifle - Halo - Printable - STL files 3D Print Model in Toys 3DExport

3D file Halo - 11 Printable models - STL - Personal Use 😇・3D print design to download・Cults

3D file MA40 Assault Rifle - Halo - Printable 3d model - STL files 😇・3D printer model to download・Cults